Dog Cut Paw Pad: Trail First Aid Guide & Prevention Tips

Updated March 2026 | By the PetLovers Team
One moment your dog is bounding over rocks with excitement, and the next, you notice a limp and a small streak of blood on the trail. Staying calm while checking the wound is the best way to stop the bleeding quickly and keep infection from setting in. With a few right supplies, even a small trail-side kit can turn panic into practical care and keep your day on track. Here's how to safely manage a dog's cut paw on a hike with confidence.
Initial Steps When You Discover a Cut Paw
When your dog injures a paw during a hike, start by keeping your cool. Dogs easily pick up on emotions, so your calmness will help your pet stay relaxed too. Move to a safe, flat spot off the trail where you both can sit comfortably, away from sharp rocks or passing hikers. This little pause gives you room to inspect the injury without added stress or risk.
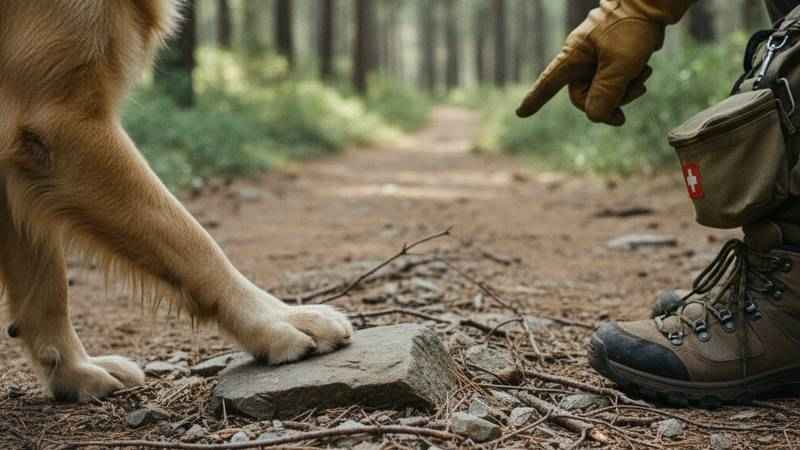
Gently lift your dog's paw and look closely under good light, checking the pad and the spaces between toes to find the source of bleeding. Stones, thorns, or bits of glass often get stuck between paw pads, especially on rough ground.
Remove anything visible with clean fingers or tweezers, but don't dig into the skin. Decide whether it looks minor enough to handle on the trail or serious enough to need a vet once you're back. Once you've sized up the situation, move to first aid care.
How to Treat a Minor Paw Cut on the Trail
A small paw injury doesn't have to end your hike early. With a steady, practical approach, you can stop the bleeding, clean the wound, and protect it long enough to make it back safely.
Stop the Bleeding
To stop the bleeding, press gently but firmly on the area with a sterile gauze pad or clean cloth for three to five minutes. Resist the urge to peek too soon since lifting the pressure interrupts clotting and can make bleeding worse. Because dogs carry most of their weight on their front legs, stopping the bleeding quickly helps take stress off the injured paw when walking.
If bleeding still continues after about five minutes, add another piece of gauze right on top instead of removing the first. Pulling it off could undo the clot that's forming. Most small cuts will slow to just a light oozing. Once it's mostly stopped, move on to cleaning the wound.
Clean the Wound
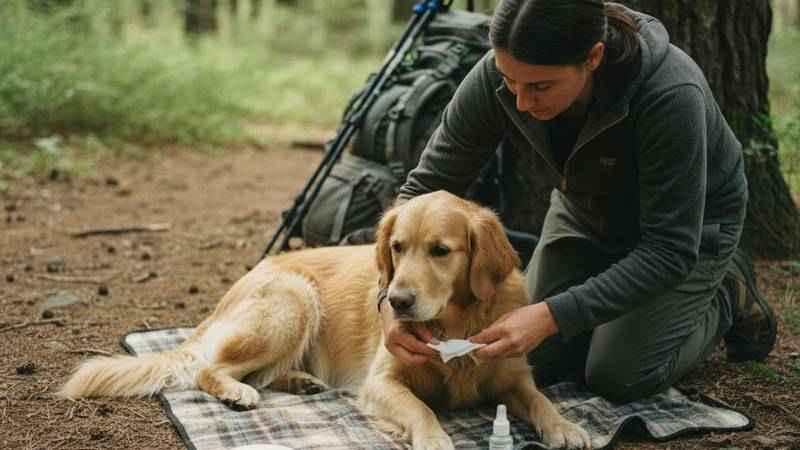
Flush the cut with sterile saline or bottled water to rinse out dirt, grit, and bacteria. Saline is especially gentle and safe for dogs since it cleans without stinging. Avoid using alcohol, hydrogen peroxide, or human antiseptics, as these can damage healthy tissue and slow healing.
Hold the paw so liquid flows downward, away from the wound, washing out debris rather than pushing it inside. Pat dry carefully with sterile gauze, don't rub. A clean wound heals faster and is less likely to get infected. Once it's dry and debris-free, it's ready for wrapping for the hike back.
Bandage the Paw for the Hike Out
Place a non-stick pad directly on the wound, then wrap the paw loosely with gauze. Secure the wrap with self-adhesive tape such as vet wrap, making sure it's snug but not too tight. You should be able to slide one finger under the bandage easily. It should hold without cutting off circulation.
For extra protection on rocky or dirty paths, slip a dog bootie over the bandaged paw. If you don't have one on hand, an extra sock or piece of cloth held in place with tape can work until you get back. This temporary cover helps keep the wound clean and lets your dog walk with less discomfort.
Essential Gear for Your Dog's Hiking First-Aid Kit
A lot of paw injuries get worse because hikers aren't prepared with first-aid supplies. A compact, trail-ready dog first-aid kit means you can react fast if your dog hurts its foot. Below are the essentials every pet owner should keep for peace of mind outdoors.
A lot of paw injuries get worse because hikers aren't prepared with first-aid supplies. A compact, trail-ready dog first-aid kit means you can react fast if your dog hurts its foot. Below are the essentials every pet owner should keep for peace of mind outdoors.
| Supply | Purpose |
|---|---|
| Sterile Gauze Pads | Stop bleeding, absorb blood |
| Saline Solution | Flush out dirt and debris |
| Self-Adhesive Wrap | Secure bandages without tape |
| Non-stick Pads | Protect wound, prevent sticking |
| Tweezers | Remove thorns or glass splinters |
| Antiseptic Wipes | Clean around (not directly on) the wound |
| Spare Bootie | Cover bandage during hike out |
| Styptic Powder | Stop minor bleeding quickly |
A pre-assembled PetLovers Pet First Aid Kit includes sterile gauze, antiseptic wipes, self-adhesive wrap, tweezers, and styptic powder in a compact, trail-ready pouch. Having everything organized means faster response when your dog needs help on the trail.
The way a dog's body distributes weight has a lot to do with paw injuries and healing. Front legs carry about 60% of a dog's total weight, which makes them more prone to scrapes and trauma on uneven ground.
Understanding trail biomechanics and paw injuries helps explain why consistent conditioning and paw protection are key for safe hiking.
When to Cut the Hike Short and See a Vet
Sometimes a paw cut that looks small hides deeper damage. If bleeding won't slow after ten minutes of steady pressure or the wound gapes open, stop hiking right away. Deep gashes, torn pads, or visible tissue need professional cleaning or stitches.
Watch for other warning signs like stuck objects, obvious pain, or refusal to bear weight even after wrapping. These could mean a fracture or tendon problem that needs a vet visit. It's always safer to carry your dog out or ask for help than push forward and risk a worse injury.
Monitoring for Infection After the Hike
When you're home, check the paw each day for infection. Signs include redness or swelling lasting longer than a day, any discharge that looks like pus, foul odor, or constant licking and chewing.
If you notice limping, heat near the wound, or swelling getting worse, it might be a sign of infection under the skin. Gently clean the area again and replace the bandage daily as it heals. If it doesn't start improving or the symptoms worsen, call your vet right away since untreated infections can turn serious fast.
Preventing Paw Pad Injuries on Future Hikes
Preventing paw injuries mainly comes down to preparation, gradual conditioning, and regular care. By strengthening the pads over time, picking the right terrain, and staying consistent with checks, you can greatly reduce the chance of mid-trail troubles.
Paw Conditioning and Trail Choice
Before heading out on long hikes, toughen your dog's paw pads with shorter walks on mild trails. Add distance slowly, usually 10-20% per week is a safe pace, according to veterinarians. This slow increase allows natural calluses to form, which helps protect against cuts and scrapes.
Choose trails that match your dog's stamina and age. Puppies and older dogs do best on routes of 2-5 miles, while healthy, conditioned adults can handle around 10-20 miles depending on fitness level. Avoid extreme surfaces like hot pavement or sharp gravel while conditioning. A cautious, gradual approach keeps paws tough but healthy.
Protective Paw Gear
Protective gear is one of the easiest ways to prevent paw injuries. High-quality dog booties shield paws from rocks, ice, or cactus spines and help keep bandages clean if your dog is healing. Make sure they fit securely but don't chafe or slip off.
Paw balms are another good option. They moisturize and add flexibility, which keeps pads from cracking. Use a light coat before hitting the trail and again afterward to soothe any dryness. These balms help both to prevent and to repair mild wear from active hikes.
Routine Paw Maintenance
Consistent paw care helps avoid repeat injuries. Trim your dog's nails often to prevent snagging and maintain a balanced stride, which reduces stress on the pads. After each hike, look over the paws for small cuts, burrs, or stones stuck between toes.
Washing your dog's paws after hikes clears off salt, mud, or irritants that could cause inflammation. After hikes, wash muddy gear, towels, and dog blankets with PetLovers Washing Tablets to remove embedded dirt, hair, and trail bacteria from your washing machine. This simple habit not only prevents problems but also helps build trust when handling their feet. Making paw checks a regular post-hike ritual ensures safer, happier adventures ahead.
Trail-Ready Takeaway
Handling a dog's paw cut on a hike takes calm focus, quick action, and a bit of preparation. Knowing how to clean, wrap, and protect a wound can keep your dog safe until you can see a vet if needed. With a small first-aid kit and the knowledge of when to call it a day, you can keep small issues from turning serious.
Heading out on a road trip to the trailhead? Make sure you have the 10 essentials every dog owner needs in their car.
For a complete emergency supply list beyond trail first aid, see our guide on pet emergency preparedness: what to pack in a go-bag.
Looking ahead, consistent conditioning, the right gear, and simple checks transform small mishaps into learning experiences. A bit of preparation keeps every hike enjoyable and helps your dog explore the outdoors with comfort, confidence, and safety.
FAQs about Dog Cut Paw on Hike
Will a cut on a dog's paw heal itself?
Minor cuts can often heal naturally if kept clean and protected, but deeper or long-lasting wounds should be checked by a vet.
What should I do if my dog's paw is cut?
Clean the area gently, press to stop bleeding, then cover it with a light bandage. If it's deep or doesn't look better in a day or two, see a veterinarian. Having a pet first aid kit on hand makes trail-side treatment much easier.
How long do raw paws take to heal?
Small scrapes or cuts usually heal within 7-10 days with good care. Deeper injuries can take weeks, so keep activity low while they mend.
Can I put Neosporin on my dog's paw?
Ask your vet first before using ointments like Neosporin, as some ingredients may not be safe for dogs.
Should I walk my dog with a cut paw?
Avoid long walks on a cut paw. Too much movement can reopen the wound and delay healing. Let your pup rest with light, supervised activity until fully recovered.
What should be in a dog hiking first aid kit?
Pack sterile gauze, saline solution, self-adhesive wrap, non-stick pads, tweezers, antiseptic wipes, styptic powder, and a spare bootie. A PetLovers Pet First Aid Kit includes these essentials in a compact, trail-ready pouch.